Old School…

Last Friday I saw a Kijiji post from a guy blowing out RC stuff that had been sitting in his garage for over 15 years. The pictures were fuzzy, and he wasn’t really sure what ran, what was broken, or even the model of one of the vehicles, but I was interested. He was asking $200… and after the weekend passed with no bites… I picked it up last Monday for $100.

What did I get? A lot of plastic parts layered with dirt, grease, cement dust and sawdust from his garage. But after cleaning things up after work this week, this is what I ended up with…

An Associated RC10 Graphite buggy: first sold in 1990. It was ready-to-run with a Futaba radio, “Magic Johnson” motor, and JR ESC. Even had 8 old nicads in the transmitter that still worked. Back when I was first into RC, this would have been one of the premium race buggies… now you may see people racing it in a vintage class, giving it to their kid to run into trees, or restored as a “shelf queen” back to original condition. I’m going to run it into trees 🙂


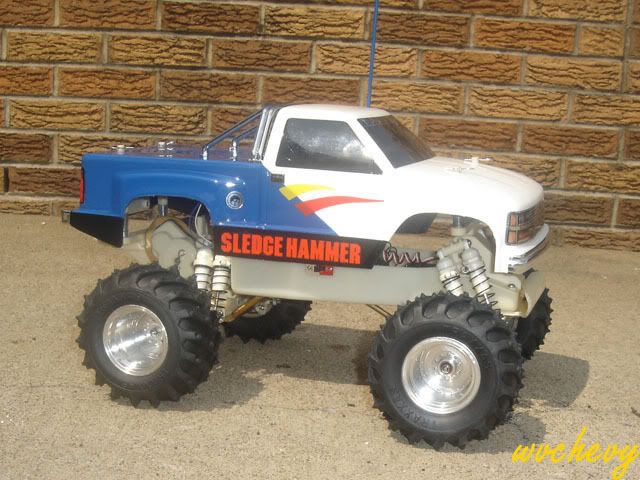
A Tamiya Bullhead, aka “Clodbuster with a different body” that also came out in 1990. Clodbusters used to be the biggest bashing monster truck you could buy… and they’ve remained so popular that the manufacturer re-released them in 2004 as the “Super Clodbuster”. This one came with a 2-stick Futaba radio, dual-steering-servos, upgraded “Monster Mash 2” motors… and the stock manual speed control (yuck!). The old speed control may suck, but this one was also-ready-to-run, coming with a second set of 8 nicad batteries in the transmitter.


A Novak DC peak charger, and a Hobbico AC/DC adjustable current charger (aka pour-current-into-it-for-X-minutes-or-it melts-the-battery charger). The two old 6-cell nicads are effectively dead. One ran the RC10 for about 3 minutes at a jogging pace, and the other let me drive the Clod from the living room to the bedroom, then died. I could buy NiMH replacements and maybe get some use out of the chargers… but my RC8 and Stampede already have Lipo batteries, so this whole setup may go in the garbage. (or, since my new Lipo batteries can’t be used in the RC10 or Clod, I may splurge for a single $20-$30 NiMH just to tie me over for now… it hurts to just look at them on the shelf when I know they can run 🙂 )


Finally, the odds-and-ends. The typical tackle box full of assorted RC parts, and an old Tamiya Hornet (1984) roller with its original box (no motor, speed control or radio). Plus a stack of extra tires for the RC10 and Hornet.


20 years ago I had a Hornet when I lived in Kenora, and it was considered a crappy car even back then. Still, because it has extra disposable tires… and because I’ll likely have some donor radio/motor/ESC parts after the Cold and RC10 get modern electrics… I think I’ll keep it around. Sometimes an old bouncy car doing donuts in the parking lot… burning off its $5 tires… is all you need to put a smile on your face 🙂

So, an excellent deal for $100, but I have to stop buying RC bits. I already have 2 runnable cars (RC8 and Stampede) and the RC10 and Clod will bring it to 4 (maybe 5 with the Hornet). I am but one man 🙂

Hard Bodies…

Both RC vehicles are still out of commission, waiting for parts. So I decided to paint the new body RC8 body I had ordered a month ago. I didn’t really need it, since the green cover it came with was perfectly functional… but since I was getting back into the hobby after 15 years, and since it was a used RC, I wanted to do something to make it feel a bit more like mine. And I really wanted to try painting again, since I had only done it once before long long ago for my Traxxas Sledgehammer.

After a lot of Googling I had a basic idea of how I wanted to paint it. Complicated designs are nice, but I needed something I could mask off with relatively straight bits of masking tape. The fewer corners I needed to learn to trim with a hobby knife, the better. After a few rough drawings I had a basic idea:


Here’s the first pass: using green painters masking tape and some newspaper to lay down the center and side stripes (which will be white), then the secondary center stripes and side pods (which will be silver), then covering up everything else (which will be purple) to only expose the 3 vent mouldings in the body:


Here’s the vents painted black, then the first layer of paper and tape removed to show the areas to be spray-painted translucent purple:


Here’s after the purple was put on:


Then I took off the masking for the side pods and secondary center stripes and put on the silver:


Finally I removed the center and side stripes and added the white (then took out the masks on the windows too):


Then added a couple decals:


And the final result on the car!


I screwed up the purple a bit (put it on too thick) and didn’t mask the black off properly, but I’m really happy with the results! I’m going to put the buggy tires back on the RC8 when I run this new cover, since the larger truck tires tend to rub the body and rip it (the green body already has several cracks in it). Maybe I’ll do a nice shiny new cover for the Stampede next!

Smile!…


…you’re on camera!

My first attempt at mounting my helmetcam to my RC truck didn’t work so well: it was velcro’d to the flexible body and shook around too much. This time I screwed together some 3/8″ dowels and other scrap wood to attach the camera to the frame, by spanning the front and rear body mounts.


The camera pokes a bit farther through the windshield now (so it records less of the hood) but it’s held on with elastic bands… so if it gets hit it can slide back into the body:


The video was better, but still very choppy. It’s never going to be perfectly smooth when the truck is flying across a lumpy lawn on little 5″ wheels. So I also washed the video though a VirtualDub plugin called “Deshaker“, then played with cropping and resizing the video to get this second demo clip:

Deshaker nudges the video frames in various directions to try to stabilize the image, but it leaves black bars around the edge to the scene (i.e. if it moves a scene a bit to the left to remove a shake, it backfills an empty black section on the right of the screen). So raw Deshaker processed video has black bars dancing around all 4 sides of the screen as it tries to stabilize the image, which is distracting. To get rid of the worst of it I cropped the 1280×720 video down to 1030×580 (so I lost a bit of my peripheral vision), then resampled the result back up to 1280×720 again. The resulting video is a bit less crisp… but a lot less shakey!

Mother of Invention…

It’s Canada Day long weekend, I had a broken RC truck… and all the hobby shops were closed. How could I have some fun until the shops opened up again? Well, only one of the two camber arms on the truck were broken, so I took off the good one and sized it up against some square poplar dowels: 3/8″ on top and 1/4″ on the bottom.


The 1/4″ inch one fit with no further trimming, success!


I ran 2 battery packs through the truck and nothing broke. Then I brought it back inside to swap to some street tires for goofing around. But with more grip on pavement the front tires were taking more of a beating on hard cornering… and eventually the little wooden camber arm broke 🙁


Luckily I still had the larger 3/8″ piece: with a little trimming on both ends it bolted right on… and lasted until I made it to Advance Hobbies on Saturday, hooray!


Next up: turning it into a dune buggy with a VW beetle body. First step: ribs on the front and something a bit knobbier on the back: stay tuned!