Using 3TB drives in your D-Link DNS-323

[Recovered: Original post date June 24th 2012]

I’ve been using my D-Link DNS-323 as a place to store backups in our apartment, but space has been getting a little tight. Hard drive prices haven’t come back down to their historic lows, but as 3TB (3TiB?) models can be found for $149 here in Toronto I decided to pick up a pair to use in the upgrade.

There was one problem: the DNS-323 was designed and shipped back when 1TB drives were the norm, and it couldn’t “see” any larger than 2TB. How to get around this? Aftermarket firmware to the rescue! The “Alt-F” project provides new firmware with many new features, including the internal software versions required to use large drives.

First I logged in to the admin interface (with the old D-Link v1.10 firmware) and pointed it to the “Alt-F-0.1RC2.bin” file I had downloaded, then clicked Apply and rebooted it when complete:

When it came back up I logged in again, but this time the D-Link web theme was gone, and replaced with the Alt-F admin pages. After stepping through a first-boot wizard that asked for things like timezone, IP settings and hostname/workgroup I was glad to see it had picked my old drives (sda and sdb, the old 1.5TB SATA models)

I used the System–Utilities page to shut down the enclosure, and swapped in my two new 3TB drives. I chose the Seagate Barracuda (ST3000DM001) SATA3 64MB-cache versions, which I was going to run as a mirror for redundancy. Booted up and there they were: showing up with “3000.6 GB” of space:

From reading the Alt-F forums I knew the admin UI had issues running the standard disk utils on large drives (see forum instructions here), so I SSH’d in directly using Putty (user: root, password: same-as-web-ui). These are the commands I ran against the first disk (“/dev/sda”)

# sgdisk –zap-all /dev/sda
Creating new GPT entries.
GPT data structures destroyed! You may now partition the disk using fdisk or
other utilities.
# sgdisk –set-alignment=8 –new=1:64:+512M –typecode=1:8200 /dev/sda
Creating new GPT entries.
The operation has completed successfully.
# end=$(sgdisk –set-alignment=8 –end-of-largest /dev/sda)
# sgdisk –set-alignment=8 –new=2:0:${end} –typecode=2:8300 /dev/sda

The operation has completed successfully.
# sgdisk -p /dev/sda
Disk /dev/sda: 5860533168 sectors, 2.7 TiB
Logical sector size: 512 bytes
Disk identifier (GUID): D07A22ED-A279-4FC8-B0F6-133DF4450139
Partition table holds up to 128 entries
First usable sector is 34, last usable sector is 5860533134
Partitions will be aligned on 64-sector boundaries
Total free space is 30 sectors (15.0 KiB)

Number Start (sector) End (sector) Size Code Name
1 64 1048639 512.0 MiB 8200
2 1048640 5860533134 2.7 TiB 8300

I then repeated the commands for the second disk (“/dev/sdb”):

# sgdisk –zap-all /dev/sdb
Creating new GPT entries.
GPT data structures destroyed! You may now partition the disk using fdisk or
other utilities.
# sgdisk –set-alignment=8 –new=1:64:+512M –typecode=1:8200 /dev/sdb
Creating new GPT entries.
The operation has completed successfully.
# end=$(sgdisk –set-alignment=8 –end-of-largest /dev/sdb)
# sgdisk –set-alignment=8 –new=2:0:${end} –typecode=2:8300 /dev/sdb

The operation has completed successfully.
# sgdisk -p /dev/sdb
Disk /dev/sdb: 5860533168 sectors, 2.7 TiB
Logical sector size: 512 bytes
Disk identifier (GUID): 674BA261-9F48-47A4-9A19-8C63889CAFA8
Partition table holds up to 128 entries
First usable sector is 34, last usable sector is 5860533134
Partitions will be aligned on 64-sector boundaries
Total free space is 30 sectors (15.0 KiB)

Number Start (sector) End (sector) Size Code Name
1 64 1048639 512.0 MiB 8200
2 1048640 5860533134 2.7 TiB 8300

Then I activated the swap partitions on both disks:

# mkswap /dev/sda1
Setting up swapspace version 1, size = 536866816 bytes
# mkswap /dev/sdb1
Setting up swapspace version 1, size = 536866816 bytes
# swapon /dev/sda1
# swapon /dev/sdb1

Next, I couldn’t tell from the forum if I should even try using the web UI to mirror the disks (since the page showed an error), so I mirrored them from the command line. Note: This command uses the latest metadata format that is too new for the OEM D-Link firmware – if you think you may want to go back to the original firmware one day don’t use this command! (and use the next one below it instead):

# mdadm –create /dev/md0 –bitmap=internal
–chunk=64 –level=raid1 –raid-devices=2 /dev/sda2 /dev/sdb2

mdadm: Note: this array has metadata at the start and
may not be suitable as a boot device. If you plan to
store ‘/boot’ on this device please ensure that
your boot-loader understands md/v1.x metadata, or use
–metadata=0.90
Continue creating array? y
mdadm: Defaulting to version 1.2 metadata
mdadm: array /dev/md0 started.

If you wanted to use the older metadata format that would allow you to flash back to D-Link defaults, add the “–metadata=0.90″ flag, like this:

# mdadm –create /dev/md0 –bitmap=internal
–metadata=0.90 –chunk=64 –level=raid1 –raid-devices=2 /dev/sda2 /dev/sdb2

You can check if the two disks are starting to be stitched together with the “cat /proc/mdstat” command. You should see the word “resync” with an estimated finish time. (Note: it may take hours, but you don’t have to wait for it to complete before performing the next steps).

# cat /proc/mdstat
Personalities : [linear] [raid1]
md0 : active raid1 sdb2[1] sda2[0]
2929741087 blocks super 1.2 [2/2] [UU]
[==>………………] resync = 11.3% (331414528/2929741087) finish=41952.7min speed=1031K/sec>

Next I switched back to the Alt-F web UI to create an EXT4 filesystem on top of the new /dev/md0 mirror. (Think of /dev/md0 as the name for the combination of your /dev/sda and /dev/sdb disks). This also could have done from the terminal, but I wanted to use point-and-click 🙂

Because the two disks are still being joined, filesystem creation can take a long time (for me about 45 minutes). You can see that it’s working by running “top” in your terminal and looking for “mkfs.ext4″:

You can also monitor the progress from the status page:

After it completed I made one last change: I ran a command to prevent the enclosure from saving so much extra space (almost 150GB) for the “root” user. On regular Linux system space is reserve so even if regular users fill the disk an admin still has room to fix things… but that doesn’t really apply for home use since even if the DNS-323 gets full it’s not booting from those disks so there’s little consequence:

# tune2fs -m 0 /dev/md0
tune2fs 1.41.14 (22-Dec-2010)
Setting reserved blocks percentage to 0% (0 blocks)

Success! The status page shows the formatted base-2 capacity of the mirror as 2.7TB (and you can also see the resync on md0 is still happening under-the-covers)

Many people are done at this point, but I needed to share the new space back out to my network using the same share name as when I was running D-Link firmware (“Volume_1″)

Note: If you hadn’t been using “user” accounts with Samba and the old firmware, you may need to SSH in one more time to run this command to let people save files to the share.

# chmod 777 /mnt/md0

Warning: This command effectively says “anyone can change anything” on the share. Probably OK for home use, but not the type of security you would use in a business.

Finally: I could see it in Windows, hooray!

Special thanks to Joao Caroso from the Alt-F project and the other users that figured all this out before me in the forums!
Followed me home…

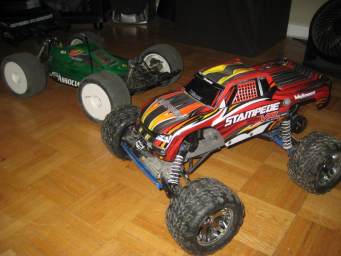
This week I had broken my big green RC car (RC8) and was waiting for parts…. but I still had RC on my mind. Friday after work I was scrolling through some local forums and came across a great deal on a Traxxas Stampede VXL 2wd: one of the vehicles that was on my shortlist when I wanted to get back into the hobby. Yes… I already had one car… but it was a bit more for racing and less for “bashing”… and the price was right (the seller had recently sweetened the deal by adding all the electronics, making it Ready-To-Run)… and it was a 30min drive away… and it can never hurt to have an extra vehicle for when you plow the first one into a fence 🙂

So I picked it up Saturday morning:


It needed a little love: some new body mounts, front springs, and to put the off-road tires back on (it came on street foam tires). Then, because it was raining, I charged it up and took it down to our underground parking garage. I was looking forward to bombing around on something slower than the RC8… with a bit more clearance to get over curbs, and something I could wheelie without regret! 🙂

Well… I was partially right: it wheelies on demand… had more clearance… and it’s fun to drive with all the handling quirks that come along with a 2wd monster truck with a high center-of gravity.

But it’s not slower.

In fact… I think it’s faster. As in drive-on-the-highway-keeping-up-with-traffic fast!

I’d need a second driver to know for sure (race it against the RC8) but for now I’m going to drive the Stampede in “training mode”… meaning it limits itself electronically to 50% power. It’s still plenty fast, and handles more like I was expecting. And I definitely have to put the wheelie bar back on… in sport mode you can be rocketing along at 80% power… and if you floor it it will still power the front off the ground and flip itself on it’s back. Crazy!

(but fun! 🙂

Old Hobby Reloaded: Complete!

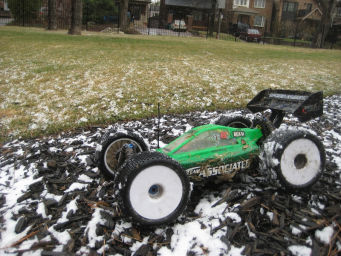
Earlier this week I got the final pieces of the puzzle: the radio and batteries from HobbyKing. Everything went together smoothly the first time… though I decided not to glue the tires to the rims before the first test drive (which was a mistake – the rubber started to pull from the rims almost immediately). 8 drops of crazy glue on each rim straightened that out…


That’s a picture of the lawn behind my apartment building. There was a bit of snow today, and I thought it would be fun to go make some tire tracks… but by the time I got outside it had already started to melt.

Now, if only the new speed control for my heli would arrive…

Curse you, Jason Liepins (Or… “Old Hobby Reloaded: Phase One”)

Back in high school I spent a lot of time and money playing around with RC (Radio Controlled) cars and boats. But then I went away to university… didn’t take them with me, and sold them all at a garage sale during a summer break. That was about 15 years ago. Haven’t thought about RC since.

Last weekend a couple my sister knew from Sault Ste Marie came to visit: and the husband, Jason Liepins, wanted to go to a local GTA hobby shop to find some parts for his new RC boat. Fair enough.

So we went on a Saturday afternoon, and we had the parts we needed about 60 seconds after walking through the door. But since it was a bit of a drive to get there… may as well look around for a bit, right? What harm could that do?

Well… seeing all the changes RC has gone through in the last 15 years started to gnaw at my mind. I made it out of the shop with credit card intact… but starting browsing…. browsing random RC sites for reviews… then looking at the buy+sell forums… then Craigslist postings… Ebay… Kijiji… and before you knew it I was starting to underbid on some used equipment: not too serious about it… but pricing out what it would take to get started again.

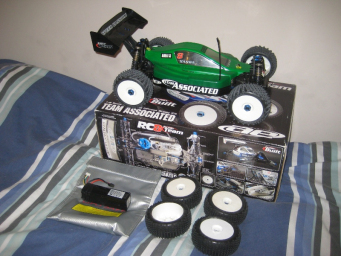
And one of those bids was accepted. Curse you, Jason Liepins… for taking me to that hobby shop. Because I left my apartment at 6pm tonight… and returned 2 hours later with a wallet $275 lighter. But with a prize as well:


Team Associated RC8 buggy, electric conversion, with extra parts, tires, battery and servo. It has begun. This car actually doesn’t have any electronics in it, yet … it’s an expensive paperweight. But now I start again… Kijiji… Ebay… Craigslist… forums… trolling for deals to make it move…

Two at the same time…

I actually bought this back in January, but have been too busy using it to think of taking a good picture. A new Dell U2410 (left) to go with my 2405FPW (right) bought back in 2005. I’ve had 2 monitors at work for years now, and it was time to get a second for home as well.

Browsing forums running while watching TV/movies/YouTube? Check! Minecraft in one screen and map viewer in the other? Check!

Playing Spreadsheets-in-Space on both? Oh yeah! 🙂


Please don’t melt my face…

…ah, dodgy Li-ion batteries, strapped to my head… what could go wrong?

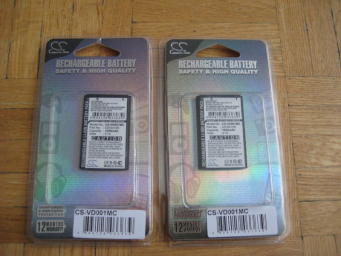
I wanted to get another battery for my ContourHD helmetcam… but for such a small battery they aren’t cheap! So I dug around the VholdR forums and Ebay… and found that I could get 2 aftermarket batteries shipped to my door for less than the price of a single OEM (even before tax+shipping!). So I send $28.53 US to Lion Battery and a week later they arrived in a small padded envelope.


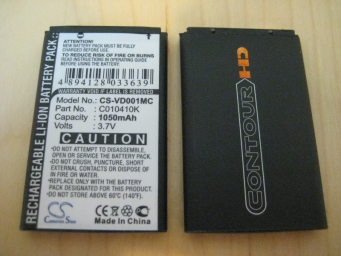
The packaging said they were made in China by Cameron Sino. Some of the OEM battery ads made a point of saying that some aftermarket batteries had a poor fit… but at first glance the Cameron Sino copies appeared to be the same size (aftermarket on left, OEM on right):


…but when you put them in the camera you can see that they’re a bit thinner: if you wrapped a piece of paper around them (or a thicker sticker) they would be a perfect fit (aftermarket on top, OEM on bottom)


I charged and discharged all of my batteries a few times and recorded run times (2 used OEM, 2 new aftermarket). It was easy enough to do: just turn on the camera… come back when it’s dead… and then look at the length of the video files it recorded. The averaged results:

OEM runtime: 2h38min
Aftermarket runtime: 1h50min

…in other words the Cameron Sino batteries only had about 70% of the capacity of the OEMs… though the advertising/packaging claims the same 1050mAh capacity of the originals. This wasn’t a huge surprise: I’m well aware of what I’m getting when I buy cheap batteries from Ebay. In this case it turned out to be a deal. Why? If I ordered 2 batteries from the site I linked above (that says they’re on sale) it costs $65.98 for the batteries, $3.30 for tax, and $5.70 for the cheapest shipping (= $74.98). The 28.53US I paid is $30.06 Canadian… 40% of the OEM price.

So, 70% of the runtime, for 40% of the price. And they still last over 1h45m before I have to swap them out. That’s a deal!

More ones, more zeros…

What do you do with an old, loud, hot fileserver that’s acting up: crashing after a couple days or weeks of use? What if it’s full of obsolete IDE drives, and the drive industry is moving to SATA? What if you’re tired of buying replacement IDE parts to limp along just a little while longer?

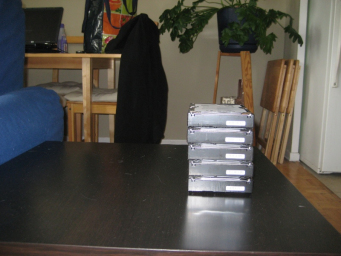
Well, if you have 5 free SATA ports… you buy 5 of the best bang-per-buck 1.5TB SATA drives and upgrade! Here they are fresh out of their static bags. They don’t take up too much space, do they?

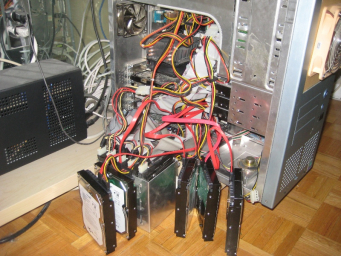
And here they are in a birdsnest of wires, hanging out the side of the case while the filesystem is formatted and all the files are copied over (which took about 12 hours):

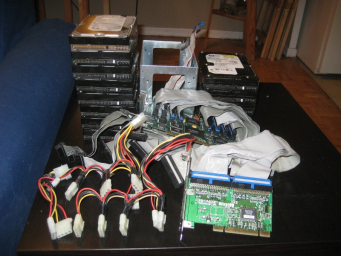
And here’s what I got to pull _out_ of the computer: over a dozen IDE drives between 200-400GB each, several feet of IDE cable, a drive tray, a stack of power cables, and the 3 PCI cards it took to hook everything up to the motherboard. Plus a 120mm fan that kept it all cool (not pictured):

What did I gain? Well, so far, no more crashing. And things are cool enough that I could remove an extra fan, making it quieter. The new drives takes up about 1/3rd of the space and use about 1/4 the power of the old setup. And capacity has more than doubled to almost 5.5TB!

Now… time to Ebay a stack of hard drives… 🙂

ContourHD

Not long after I bought my SV, I also bought a bracket that allowed me to mount my DV cam to the gas tank. I only ended up using it once… because DV cams at the time were still pretty big to be bending over one riding a motorcycle… it took space normally reserved for my tank bag… and it was only high enough to be peeking out through the mini windshield on the bike. Good to protect the camera from wind blast… but you know how clear plastic can get enough fine scratches on it that it appears hazy? Yeah, that’s what I had… so the video I did record was less than stellar.

Fast forward a couple years, and I friend I met through the ODSC site, BJ, owned a GoPro HERO Wide helmet cam… and I wanted one! It took good video and was compact enough you didn’t notice it on your helmet. So after seeing the raw and YouTube versions of his footage, I went online to get one myself.

“But…” I thought, “before I commit… I should look around and see what else is out there”. Maybe I could wait for a new version of something just a bit shinier?

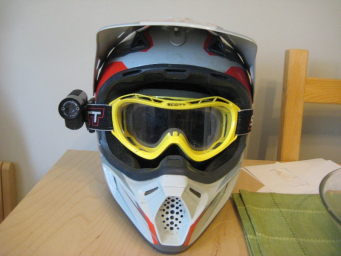
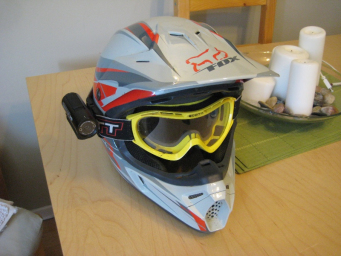
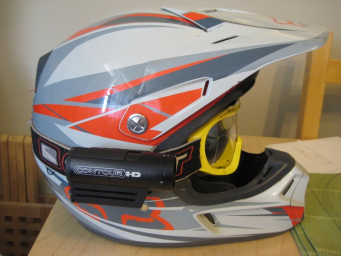
I found the ContourHD. A little bit larger than the GoPro, but could take a bit more detailed video and accepted larger SD cards. It came with a standard sticky mount and one designed for the strap of your goggles, like you use on a dirtbike. Here it is on my crusty old helmet:

At the highest detail (1280×720, 30fps, 135 degree FoV) it consumes a gig of storage every 30 minutes, and at the lowest res (848×480, 60fps, 90 degree FoV) it can store 60 minutes of video in the same space. Since it only comes with a 2GB card out-of-the box (1 hour of HD footage) I bought a 16GB card to go with it. Theoretically that should allow about 8 hours of HD… more than enough for a days ride…. but my second battery hasn’t shipped yet. So I have storage for 8 hours… but with the standard single battery I only have the juice to record 2 hours.

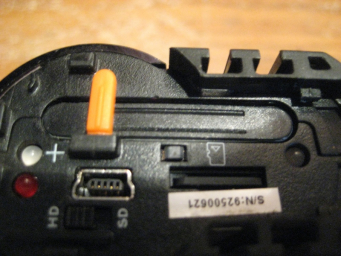
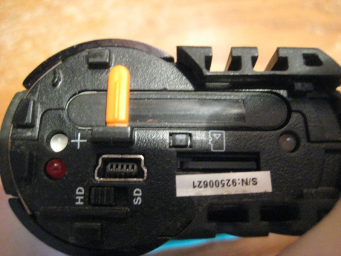
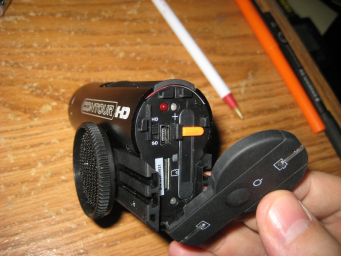
All the goodies are behind one door on the back: microSD slot, battery, USB port, and HD/SD switch. It’s fairly easy to use: a button on the back to turn it on (15 minutes of inactivity and it turns off)… big slider on top (easy to use with gloves): push it forwards and it beeps once to indicate the start of a new recording… slide it backwards and it beeps twice to say it has stopped.

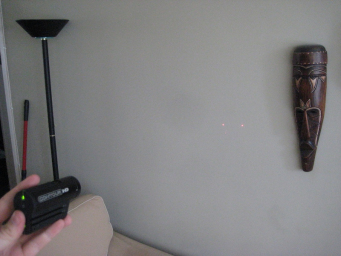
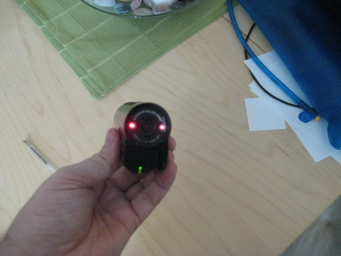
And… something I’ve never seen before: for a couple seconds on initial startup or for about 10 seconds if you hold down the power button for 3 seconds… two tiny laser lights to indicate where the camera is pointing, and if it’s level (the lens can be rotated through 90 degrees in case the mount point is crooked). Here you can see the 2 red dots on the wall, and on the camera:

I don’t have any real footage yet, but as a sample of what I get off my 3rd floor balcony on a sunny day: (note: playing these links in my browser seems to make the video jerkier than if I play them in a standalone player like VLC):

SD Example Clip (7.5MB)

HD Example Clip (13.5MB)

I can’t wait to use it for real this weekend!

WordPress & plugins are some pretty slick software…

A couple years ago now I decided to stop hosting any sort of public web service (like this web site) on my home computers. Residential broadband connections were still a bit flakey, upload speeds were low, and as cool as it may be to have total control over things… I didn’t want to deal with mundane day-to-day maintenance.

So I bought a few years of dirt-cheap hosting at GoDaddy and installed WordPress. This made it easy to post new info (since the browser is also the text editor in WordPress), and the GoDaddy people take care of keeping everything online.

Then I started to get comment spam. So I installed the Akismet plugin… and although I’ve continued to receive over 8000 spam comments… none have been posted.

Then as I started to post more info and pics to the page… I got worried about unrecoverable failures. So I installed the BackupWordPress plugin, which performs a backup and emails a compressed copy to my Gmail account daily.

Then I installed the WP Super Cache plugin: just because I like the idea of caching and compressing content to make the most of the precious commodity (bandwidth) while burning off the resource that’s effectively free (CPU time).

Finally, about 30 minutes ago, I found a WordPress plugin that became my new best friend. I hadn’t upgraded WP in almost 2 years… just because I thought it would be too much of a hassle… even though I knew I was running a version with bugs and known vulnerabilities (perhaps one reason I had so much comment spam). WordPress Automatic Upgrade did all the heavy lifting for me: now I’m running the latest version and all my posts and pics have remained intact!

All this software is 100% free to use, and has a vibrant community surrounding it. Although I haven’t tried any of the competitors of WP, I think WordPress is a great tool for making your own little home on the web!

Time to try a new ISP…

I’ve had Rogers “Extreme” cable Internet for over a year now… and although connectivity has been solid, the speeds have become slower, and slower, and slower. It’s at the point now where on average my DSL line moves 3x-4x more data than the cable line every day.

The main reason for the speed decrease is that Rogers is restricting how much information certain programs can move over their lines. In the past they mostly restricted “Peer to Peer” (P2P) programs… but now they’re also throttling encrypted traffic as well. When most other ISPs are selling you unrestricted Internet access it doesn’t make much sense to pay for a premium package from Rogers that is actively trying to slow you down.

Throttling of encrypted traffic doesn’t make much sense to me. If anything the Internet would be better off with more of it’s day-to-day traffic being encrypted… and Rogers is essentially saying that if they can’t read the information coming out of you personal computer they’re going to slow it down. It’s sort of like the post office saying they’ll deliver postcards (where everybody can read what you wrote) at the regular speed… but anything you send in an envelop will take 10 times longer. Read more here:

Original Site
Slashdot gets in on the act

So, I’m going to price out a dry DSL line from Sympatico or TekSavvy instead. Rough back-of-the-napkin math shows I should save $5-$10/month, and also get a faster connection to boot. What’s not to like?