Screws, loose.

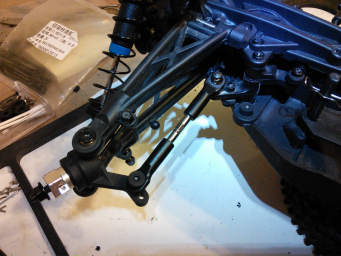
I had read about a weakness in the ECX 1/10th 4wd platform… but it wasn’t until I had crashed my Circuit a few times that I really knew what people were talking about. The front A-arms seem strong enough… but the hingepin braces that hold them have a problem: they’re not attached to the front diff case very well. A solid hit will push the A-arm backwards and rip the rear brace out of the back of the diff, stripping the short Phillips screws that hold it on.


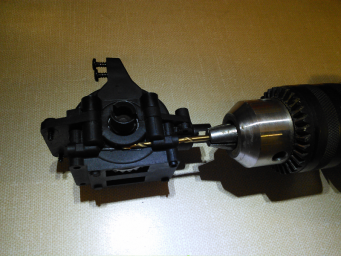
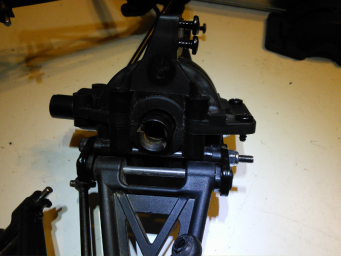
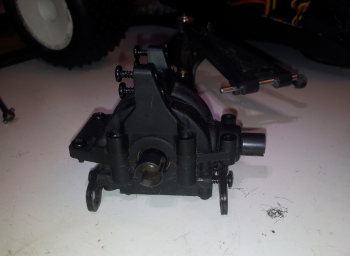
When you break an A-arm in most cars they’re easy to replace. When you strip the rear hingepin brace out of the front diff on a 4wd ECX you have to take out at least 20 screws to get at it, and if you have to replace the case it can be messy (as the front diff has probably leaked some oil, or is coated in grease). After reading about how others are trying to fix this problem, I took a stab at it myself. First I used a 3/32″ drill bit and drilled the case from both sides, to make one single hole from front to back:


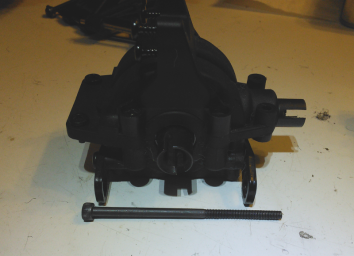
Then I ran a M3 * 60mm cap-head screw through the whole thing. I had estimated the length of the screw I needed before taking the diff out: if I did it again I’d order M3 * 55mm as 60 is a bit too long:


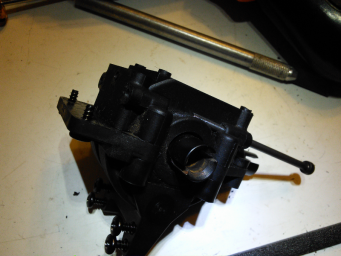
You can see that the hole you drill nibbles a bit into the underside of the diff bearing mounts, but there’s still lots of plastic there and it doesn’t penetrate the case. The screw is only half exposed under the bearing:


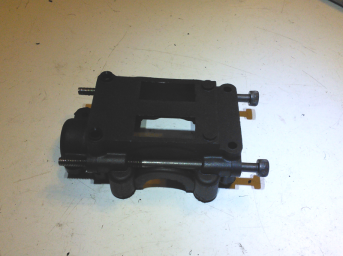
Since I had the drill out anyways, I predrilled a second front bottom diff case and left the screws in. If I have to make this repair again it will save some time:


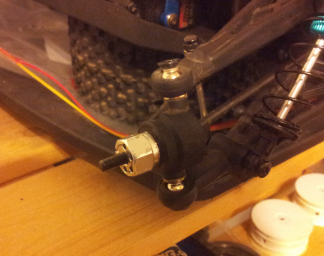
At first I planned to have the head of the screw at the front of the diff (behind the front bumper)… but then it looked like the extra 5mm of thread would interfere with the steering rack. So although it was harder to get at for maintenance… I put the screw head towards the middle of the car and secured the threads at the front with a M3 locknut:


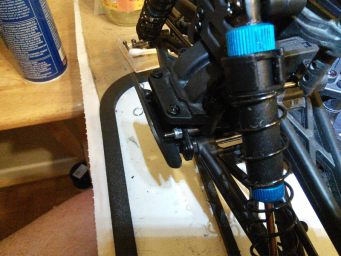
The extra thread+locknut had clearance behind the front bumper, so that worked out fine: but once I got the A-Arms reattached I could see the steering limiters would have stopped the steering rack before it hit the locknut (if I has put the screw in the other direction). So, if anyone else tries this, buy M3 * 55mm screws instead, and put the locknut towards the middle of the chassis.


This mod makes the front hingepin system much stronger. I don’t like breaking parts but I’m willing to replace more front A-Arms if it means the front diff stays intact and the hingepin screws don’t strip.

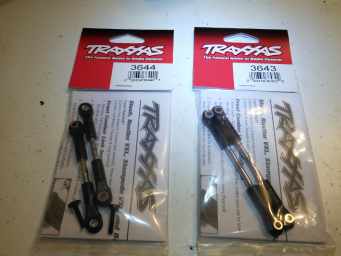
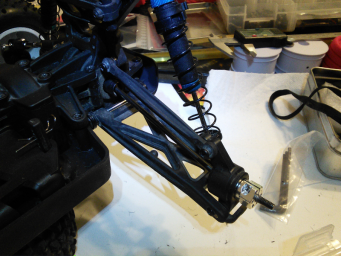
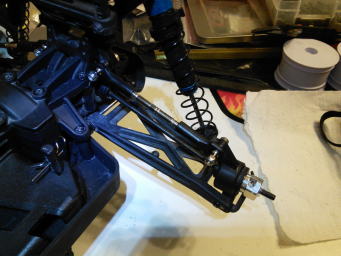
While I had the tires off I also replaced the stock fixed-length links with adjustable replacements from Traxxas. TRA3644 for the front steering and TRA3643 for the rear camber:


Front before and after:


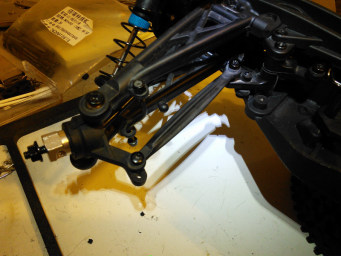
Rear before and after:


Now it’s time to take it back to NRC and see if I can break it again! 🙂
Doing the Circuit

I’ve been wanting to buy a 4wd Stadium Truck… the problem was that nobody really sells them off-the-shelf (with one exception). I had looked at various 4wd platforms to build by own… and had decided to try something based on the new ECX chassis if I could find one cheap…

…and eventually I found one…

sort of 🙂 .

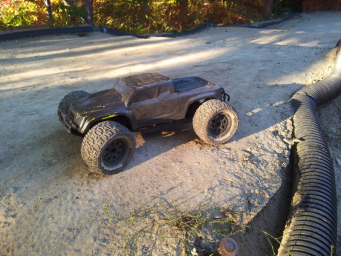
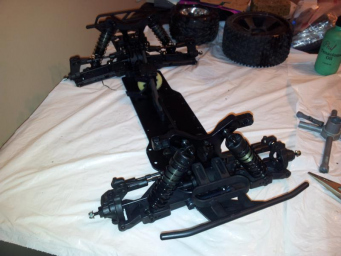
I found the “Ruckus” Monster Truck variant for a good price: a bit ugly because the last owner attacked it with a can of black spray paint… but the guts were good:


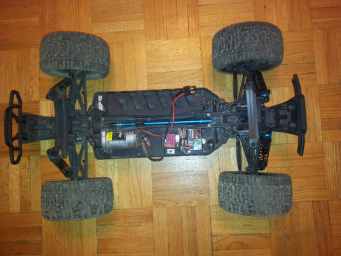
Here’s the stock Ruckus electrics and chassis. It was too long to fit a Stadium Truck body… but I could buy a shorter frame for the “Circuit” model to bring it down to size:


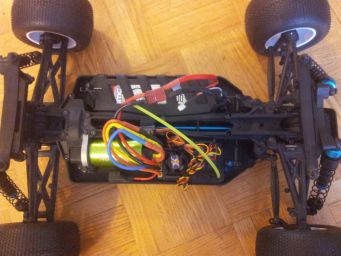
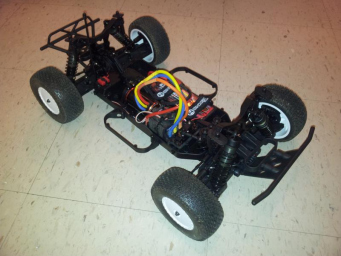
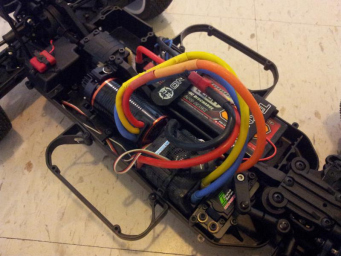
After some quality time with my electric screwdriver, here it is with the short chassis (trimming about 4cm from the middle) and with the new budget electrics. Hitec metal-gear servo, HobbyKing X-Car 120a ESC, and Tacon 2-pole 3500kv 550-can motor.


The stock ECX Circuit didn’t run real 2.2″ Stadium Truck tires. TLR 22T rims were much too narrow… but AE T4.2 rims were close. To get them mounted I added 10mm-long 12mm hexes from Ebay… that were drilled out a tiny bit from a 5mm hole to a 6mm hole on the axle side. Now the AE rims fit with perfect clearance!


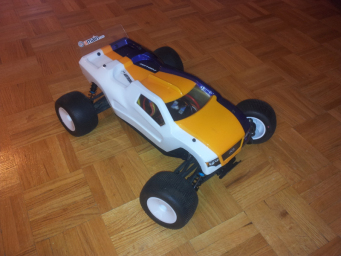
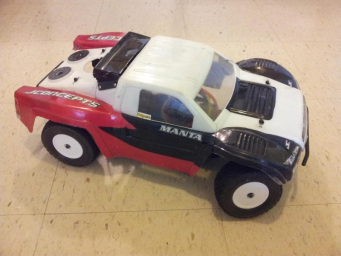
Then I swapped the front and rear body posts around and painted up a Pro-Line Bulldog ST body made for a Traxxas Rustler. Finally, I had the look of a regular 2wd Stadium Truck… but with 4wd!


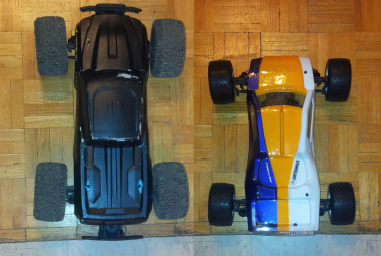
I also bought some Traxxas adjustable rear-camber and front-steering links, but haven’t mounted them yet. In the end even though the chassis only shrunk about 4cm… by the time you take off the front+rear bumpers, add the slammed ST body, and shrink the tires by an inch you get a noticably smaller truck:


Time for it to join the fleet and get back on the track!


Soylent in Canada – People Chow 3.0.1

Last year I started to see articles about Soylent on the websites I frequent: and as an overweight guy who eats all the wrong foods – it caught my eye. The idea of ‘meal replacement’ foods isn’t new… but they’re trying to make something simple, cheap, and that you could eat 100% of the time and stay healthy. I liked the idea of making some breakfasts or dinners by just adding water and shaking things up, so I signed up for a couple weeks supply.

Sadly, they don’t ship out of the US yet, and Canadian orders may not arrive until 2015. But all the buzz about Soylent jumpstarted a community of people creating DIY (Do It Yourself) recipies to try to do the same thing: with one of the most popular right now being People Chow. (Great name! 🙂 )., I read more about the DIY projects in the official and Reddit forums and decided to give it a try!
The ingredients list included some supplements I had never heard of before, but I ended up being able to find all but one of them (from GNC) in the mall below where I work:

  • Masa Harina (‘Maseca’ brand): $4.49 at Metro
  • NOW Foods Whey Protein Isolate (vanilla): $48.58 at Nutrition Village
  • NOW Foods Calcium+Magnesium supplement: $14.68 at Nutrition Village
  • NOW Food Potassium Citrate: $15.81 at Nutrition Village
  • Choline Bitartrate: : $6.77 at Nutrition Village
  • Vegetable Oil (100% Soybean Oil): Store in my apartment building (or from Metro)
  • Salt: $0.00 from the cupboard
  • GNC Mega Man Vitamin (vanilla): $56.49 at GNC

(all prices Canadian, including tax)

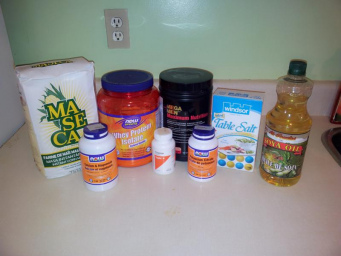
All the ingredients came in different sized packages, and are mixed in different ratios, giving me between 6 and 80+ days supply. Plugging everything into a spreadsheet showed that it cost me about $8.50/day in food, which could quickly drop to about $6/day if I bought some ingredients in bulk (lots of them are cheaper in the US, where it could cost as little as $3.50-$4/day). One batch is 2000 kcals, and gives you 100% (or more) of your daily recommended intake of… well… everything 🙂 . This is what I bought:


I made a couple mistakes: I didn’t notice that I bought some of the supplements in pill form (instead of powder) – so instead of just drinking the mixture I also have to take 3 pills per meal (2 Choline Bitartrate and one Calcium+Magnesium). I’ll finish them off in a few weeks and make sure to restock the powder form: I’ve already seen some of the ingredients much cheaper at purebulk.com (even when US shipping almost doubles the cost).

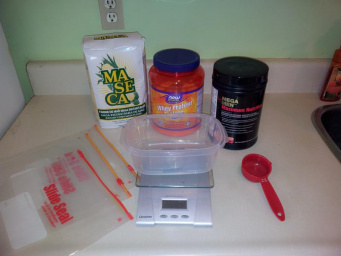
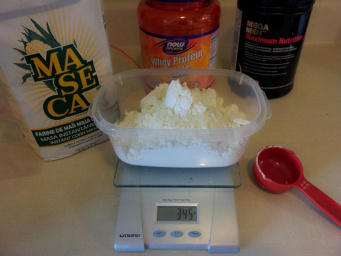
I’ve been mixing things up 3 days at a time (one ziploc holds one day of food). Right now I’m only eating 1-2 meals a day of People Chow to see how it goes – usually every breakfast and the occasional dinner. All I’m using is a scale that can measure down to 1 gram (my largest measurement is 345 grams, and the smallest is 2 grams), a small measuring cup, a small tupperware container (and the 3 ziploc bags):


Here’s 345 grams of the Masa flour: I measure it on the scale into a tupperware that’s a bit longer than wide…


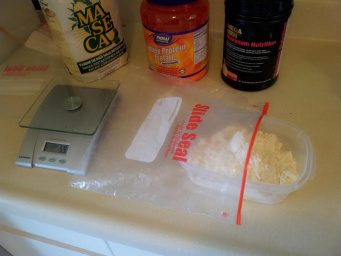
…so I can fit it in the ziplock to dump it out.


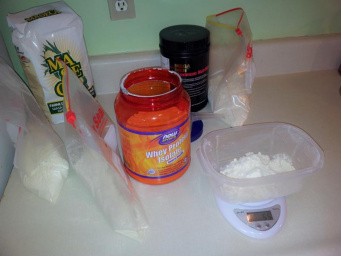
Next by bulk is the whey powder. I move the ziplocs from left to right as I fill them with each ingredient, in case I have to stop, so I don’t come back and forget what I’ve already done.


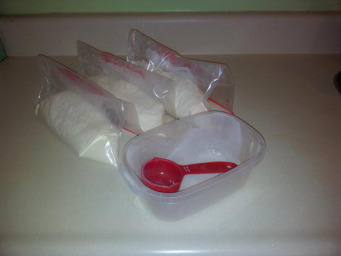
This is after I’ve worked my way through all 7 ingredients (leaving the soyabean oil to be mixed when I add the water). I’ve prepared enough powder for 3 days worth of meals and I’ve dirtied one scoop, one tupperware container, and 3 ziplocs (which I wash and reuse):


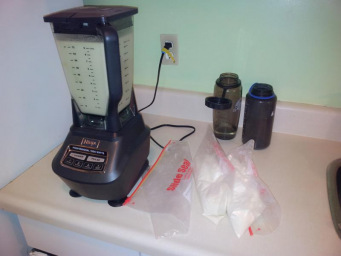
You can mix some powder+water each meal (dump them in a water bottle and shake) or give everything a good mixing in advance. I’ve been blending one bag (3 meals) up at a time with the soyabean oil… then pouring everything into 3 1L containers that I can leave in the fridge. I borrow my sisters thermonuclear blender and it makes short work of it:


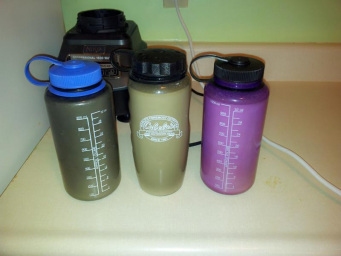
This is what I leave in the fridge. The ingredients don’t mix 100%: it’s more of a suspension of the corn flour: so I still give it shake before I drink it. The taste is very slightly sweet, and like drinking a bowl of tortilla chips. It’s also a bit silty, especially when you’re getting to the bottom of the bottle. There are lots of ways to flavor it (my mix has a bit of vanilla, but others add cocoa powder, or cinnamon, or brown sugar) but I’m going to stick with the original recipe for now:


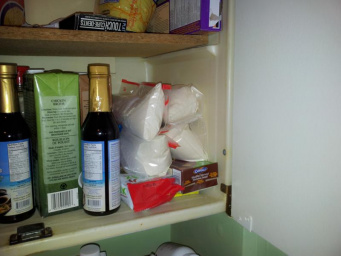
Here’s 4 days of People Chow in the corner of the cupboard. One large ziploc can hold 3 days of food easily (in case you wanted to travel with it or something) but I’m leaving it as one-day-per-bag so I can dump it in the blender and not have to measure anything.


I still plan to try the commercial Soylent blend (which I’m sure will also change over time) – but until it’s available I’m going to try a few DIY recipes. Maybe none of them are 100% perfect and the community will tweak the mixtures over time as we learn more about what’s “healthy” – but I believe in all cases I’ll be eating better than I have been the last 15+ years. I’m going to get a blood panel done after a month to make sure I’m not pushing any vitamin/mineral way out of whack: but until then I’ll stick to 1-2 meals per day of DIY Soylent. So far it looks like a no-brainer for breakfasts, and I plan to take it to the RC tracks with me on weekends so I have an easy alternative to the fast food I normally eat.

Bringing Order to Chaos

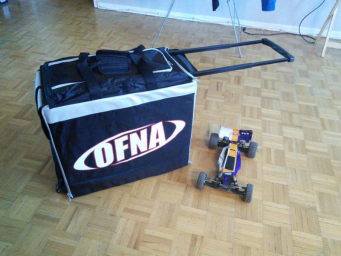
Usually when I show up at a RC Track I’m lugging a large toolbox, wearing a packsack, carrying a reusable grocery bag… and I still need to make a second trip back to the car to get my RCs. After seeing how other hobbiest were carrying their gear around, I asked for an OFNA Hauler Bag for Xmas… …and Santa got my letter! 🙂
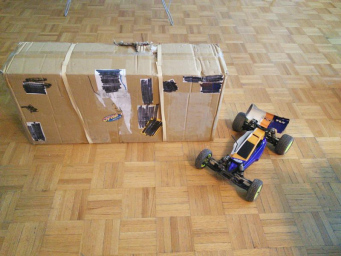
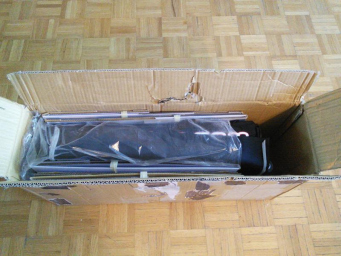
Because I fly home for Christmas, Old Saint Nick thoughtfully drop-shipped the bag to my apartment (Losi 22 buggy for scale):


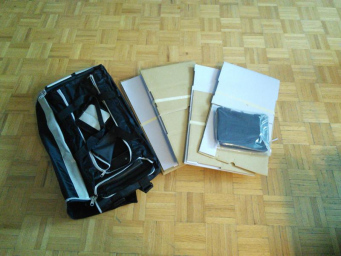
Inside was a tough nylon bag, and a lot of cardboard:


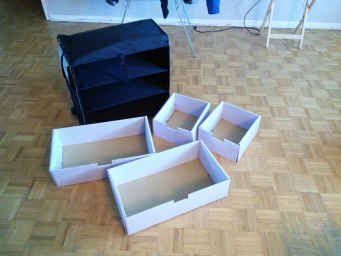
Assembly was straightforward. The main bag had plastic walls that folded up and out to give the whole thing some backbone, and tough slats with strong velco on each end spanned the inside to create 2 shelves. Then the cardboard slabs could be folded into 2-ply drawers:


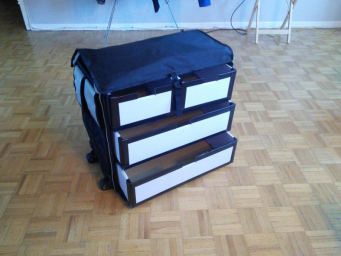
I saw some suggestions online to tape the edges of the cardboard: the drawers were strong enough but they would wear as they were moved in and out. I applied Gorilla Tape to mine:


With the side panel rolled down and held with 2 zippers and a velcro flap everything was snug as a bug in a rug! Pull out the handle and tilt the bag back a bit, and it easily rolled across the floor on 2 wheels that were braced into the bottom.


I’ve been back to Apex RC twice with the bag now, and it holds all my tools, charger, and radio with room to spare! I still usually bring a packsack, but now it’s only for things I rarely need so it can stay in the car. It has also brought a bit more organization to my RC setup at home since I can pretty much “live out of the bag”. RC Hauler/Carrier bags start at around $100, but they’re a great way to keep everything in one place in a package that’s portable!

Apex Indoor RC: Try try again…

Last winter I enjoyed running my RC cars at Universal Raceways: it wasn’t too far of a drive, the track was indoors, and they had an on-site hobby shop.

But they went out of business.

Around the same time they closed their doors, Sids Raceway opened for the season. It had a much larger dirt track, was about as far away as Universal… and there were 2 Hobby Shops within a 10 minute drive if you broke anything.

But then it started to get cold: and Sids is outdoors.

So, where to go this winter? There were some indoor offroad/carpet tracks about an hour from my apartment… but I had run on carpet for 2 winters now. Last November I had read that a track in Brantford was moving to a new location that was indoor and had a clay surface: Apex RC. Sign me up!

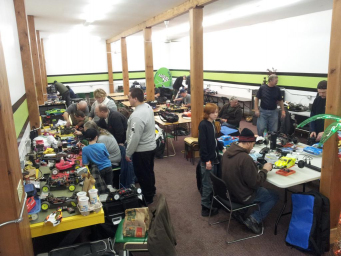
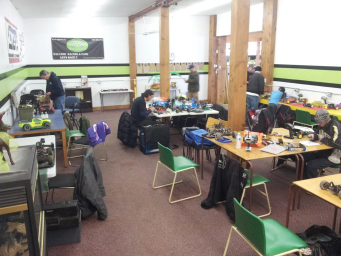
This is what you see when you come in: a few stands with kits/tires/snacks, a wall of parts and paints, hotdog and pizza machines, some tables to kick back and relax, and bottomless cups of coffee for $2!


To the right is a large open pit area: every 8′ table has room for 2 people, and each person gets 2 power plugs. It’s well lit and there were extra chairs for those who brought friends and kids. The air felt a tiny bit damp, but that’s because the tracks clay surface gets watered a few times a day so it’s always a bit humid.


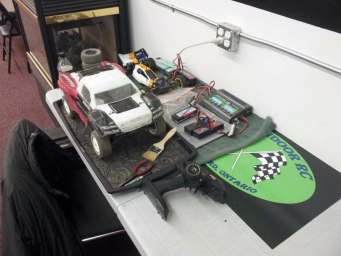
Here’s my little corner of the world: my beat-up Tekno SCT410 truck for bull-in-a-china-shop driving, and my Losi 22 1.0 buggy for something a little more refined:


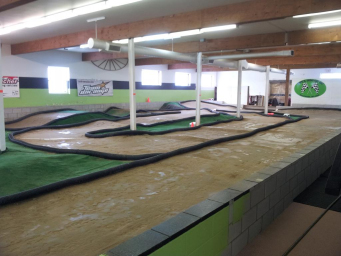
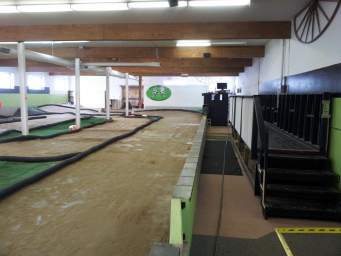
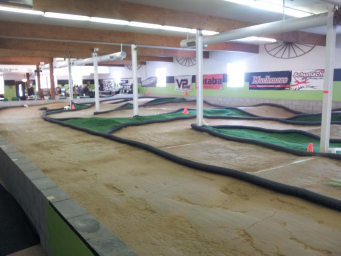
And finally the track itself: with a nice long straight up close to the drivers stand and a banked corner at the end to help keep you off of the wall, some small ripples in the infield to keep your suspension unsettled, and a double-single tabletop combo along the back wall with a very short runup to let you air things out. My 4WD Short Course Truck had no problems launching itself over those jumps… but I struggled with my 2WD buggy to get up enough speed without spinning out. I crashed many times along that back wall 🙂


The first time you show up you sign a standard waiver and give them your MYLAPS transponder number (if you have one). The owner and staff were very friendly, and they did a great job keeping the track in shape with periodic watering… and switching to timed practice (buggies, and SCT/ST) when things got crowded. I’m hoping they add a bit more parts support, but I understand they’re not trying to be a full Hobby Shop (they have a great selection of tires though!)

This past Saturday was my second trip there, and I hope to go again a few more times this winter. The only thing that would keep me away would be the distance: it’s a solid 90 minute drive for me each way from Toronto, and that’s more time than I like to spend on Canadian highways in January.

A Brontosaurus in the family…

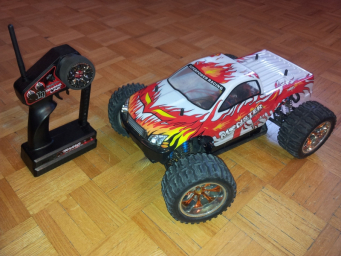
One of the most common “off-brand” RC monster trucks is the HSP Brontosaurus (aka Redcat Volcano EPX Pro, aka Exceed Infinitive). It comes brushed or brushless in a rainbow of colours, and has been rebranded by a dozen different companies. Is it a race machine? No. Is it cheap enough you don’t care if you break it? Yes! 🙂

I saw a great used deal online and couldn’t say no: it came ready-to-run with a space parts chassis:


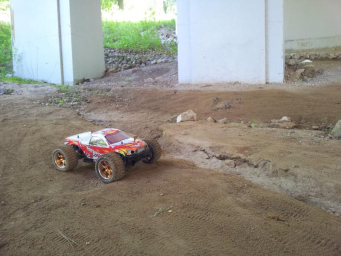
It actually came with so many extras I sold some to offset the cost, but first I took it out to bash in the local park:


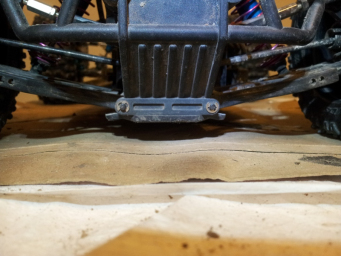
This model of truck has a known problem with the rear suspension: the stock dogbones are a bit too long and prevent the chassis from making it all the way to the ground.


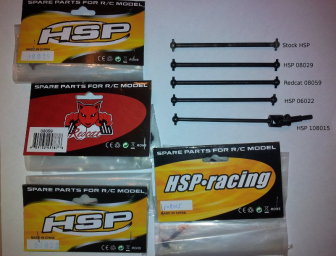
The fix is simple enough: use shorter dogbones… but after reading a number of forum posts I couldn’t figure out what part numbers were a bit shorter and which were the same length. Since they were only a few dollars each shipped on Ebay… I just bought a bunch of them 🙂


If you have a Brontosaurus/Volcano/Infinitive you want HSP part number 06022. My stock dogbones, HSP 08029 and Redcat 08059 were all exactly the same length: too long. I tried the HSP 108015 universal but it was also too long, even to long to be put in the front of the truck. With those slightly shorter 06022’s swapped in the rear of the chassis could make it all the way down to the ground: success!


The stock tires were pretty horrible so I sold them, and swapped in the ProLine Badlands I was running on my old Redcat Caldera. Time to go back to the park!


Speaking of the Caldera, I’ve seen some people asking about it, especially since the brushless Redcat Caldera (BSD rebrand) and Redcat Volcano (HSP rebrand) aren’t too far apart in price. I’ve owned both (the Caldera much longer) so these are my thoughts so far:

Redcat Caldera

  • Tougher build and thicker plastic parts (some the same as the 1/8th and 1/6th models)
  • Comes with a less powerful 370 (finned 540) motor, and ESC
  • Stock shocks have some binding out-of-the-box, but are perfectly servicable (and can take Revo/Jato springs)
  • Crappy tires
  • Limited aftermarket. There seem to be fewer BSD rebrands so Ebay isn’t as full of cheap aluminum hopups and doodads (and those that are there are more expensive)
  • Parts won’t be in your local hobby shop, but there are lots of Redcat dealers
  • Thick axles and large bearings all around: easy to switch to OEM 17mm hubs if you want
  • Universals all around, but they’re soft: the front CVAs will bend all the time after even minor impacts
  • Stock front plastic hubs aren’t mounted well: the bottom screw pivot will always fall out. But metal hubs are a cheap upgrade and threadlock solves the pivot issue.
  • Goofy battery tray: the batteries mount sideways so you’re limited on how large a pack will fit, and the wires can only come out of the pack in certain directions
  • The stock differentials are a bit soft if you upgrade the motor, but the hardened 1/8th-1/6th models drop right in (and appear bulletproof: I’m feeding them 6S in my Shredder)
  • Body mounts aren’t great: they look weak and the posts are close together, but I’ve never broken them

Redcat Volcano

  • Suspension components look frail compared to the Caldera, but I haven’t snapped any A-arms yet
  • More powerful motor stock, I think it’s a bit faster out-of-the-box
  • Shocks are horrible. The pistons are loose and have huge slots in them: I put in 100-weight oil and it’s still too thin
  • Crappy tires
  • Lots of HSP uplifts bits on Ebay
  • Parts won’t be in your local hobby shop, but there are lots of Redcat dealers (plus very cheap parts on Ebay! Did I mention Ebay?)
  • Short thin axles and smaller bearings: my Traxxas rims are almost too thick in the middle to mount (not enough thread left sticking out of the axle to get a locknut on all the way
  • Dogbones seem to get a slight bend to them easily… but continue to run (at least the fronts). I need to run into more things to tell if the front setup is tougher than the Caldera. Wish it came with universals
  • Regular battery tray: no problem fitting standard 2s hard/soft lipos
  • Diff strength is currently unknown. I bought this truck used and I haven’t opened things up to poke around. I’m also using the stock motor
  • It seems to get sand caught in the spur much easier than the Caldera
  • The plastics feel overall more flexible than on the Caldera
  • Body mounts and posts are more substantial and mounted firmly to the shock towers

Both trucks are based on a core onroad platform with NiCAD/NiMH cell cutouts on the bottom – those slots are basically a cheese grater against the dirt if the chassis ever slaps, so sand and dirt will get everywhere. Overall both are good bang-for-your-buck entry-level trucks and it’s hard to pick between them. If I were forced to buy one or the other today … I think… I would choose the Volcano/Brontosaurus. Why? Three main reasons:

  • The constant bending of front CVAs on the Caldera was ultimately why I sold it. Perhaps the Brontosaurus has a similar fatal flaw but I haven’t driven it enough to find it yet
  • The Caldera sideways-battery-mounting setup was annoying. Many vanilla hardcase lipos wouldn’t fit as the wires didn’t come out in a place that would fit
  • Based on the limited number of parts I’ve had to order so far…. HSP/Volcano parts are much more plentiful (and cheaper) online and on Ebay than BSD/Caldera parts

That’s it for now: I’ve been feeling sick all afternoon and it’s time for bed. I had these photos queued up for so long I just wanted to get them posted….

A Short Course in Tekno

I sold my Caldera, which meant I could give myself permission to buy another toy. I wanted another generic 4wd platform to fiddle with and although I looked at some alternatives, the short-list was two Short Course trucks: a Losi SCTE 2.0, or a Tekno SCT410. The day after I had decided on a SCT, Amain had a sale on Tekno products… so the decision was made for me.

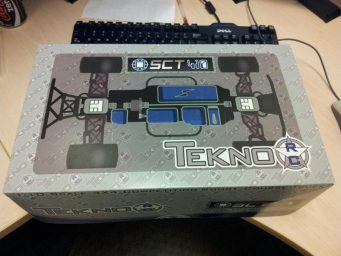
A few days after ordering a surprise arrived in the mail!


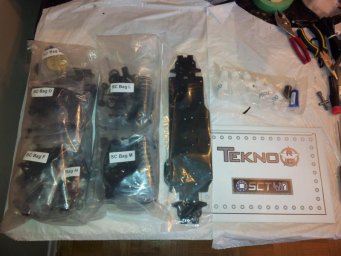
The box was small, since Tekno doesn’t include a body or tires/rims. Two large parts bags, the aluminum chassis, a manual, and a bag of various oils, grease and threadlock.


The parts bags were laid out perfectly: not only was each sub-assembly in it’s own lettered bag (matching pages in the manual)… the bags had been packed in the correct order to be pulled out sequentially. Done one step? Just grab the next bag in line! First you built the diffs: front/center/rear


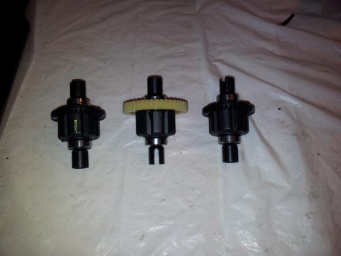
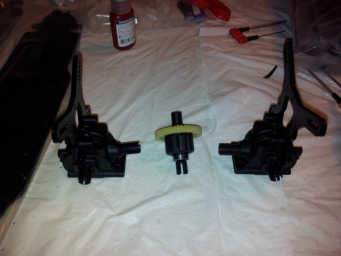
Next the front and rear gearboxes. The shock towers are made of beefy aluminum and shims were provided to perfectly align the diffs. The moldings were crisp with little to no flashing. The tiny bit of trimming I did wasn’t for fit: I only shaved a couple slivers off for cosmetics.


Next came the A-arms, bumpers, driveshaft, hubs, and swaybars. Tekno provided the perfect number of screws and made it easy to compare sizes to make sure you were using the correct ones for each step. Until now I thought my RC8Te was the most solidly put together kit: but the Tekno beats it!


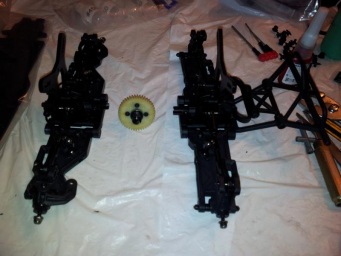
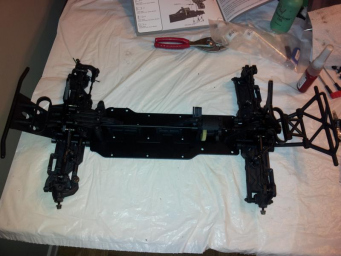
Finally it started to look like a truck once the center diff was installed and the front+rear assemblies were bolted on:


I attached the plastic siderails and bumpers and started to install the electronics. I recycled a black HobbyWing 150A ESC, transponder and lipo but the rest was new: RX471 receiver, RP1005M servo, and 4600KV motor. The motor/ESC/servo is a tight fit and I haven’t figure out the best wiring layout yet, but it works!


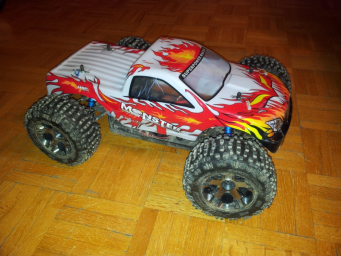
And here’s the final result. I used new Pro-Line Calibers on DE Racing rims, but recycled the body. Yes… after all the new electrics I’m using a beaten up body that someone else painted that came with my old SC10 2wd 🙂


I’m still breaking it in, but I’ve been very impressed with Tekno so far. This is my first kit from them (and there is only limited local parts support) but I’m hoping it’s tough enough I won’t be breaking it all the time. Now to take it to Sids!

Morning Edit: 7am at the secret testing facilities 🙂


Scotty…I Need More Power!

This is was my old charging setup: 50w and 80w chargers fed from a 24a 12v power supply. All of those pieces came used as part of other RC bundles I bought, and they worked fine, but they charged and discharged slowly.


For 2s lipos the 80w charger wasn’t so bad since it could do 10a… but as battery capacity went up past 5000mah it could no longer even do 2C. And for 4s batteries it was capped at 6a: barely over 1c. The discharge capabilities were also low: 1a/2a max, so “storage charging” batteries I didn’t end up using took a long time. Time for an upgrade.

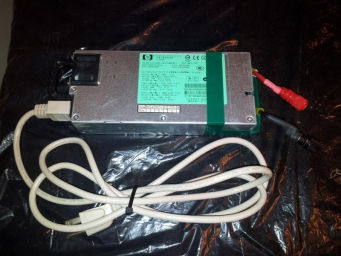
I had a charger in mind, but first I would need a larger supply – I wanted to charge two 4s 5000mah lipos at 4c with a bit of headroom for larger batteries down the road. So the 24a supply wouldn’t be enough. Enter Robert from RCC: he sells computer server power supplies wired up to be general 12-volt supplies, primarily for use by RC hobbiests. I ordered a 900w 75a HP model from him and it arrived in the mail in a couple of days:


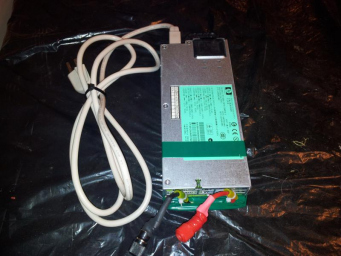
He adds 4mm female bullet connectors to the proper places on the backplane and makes sure the wires have a bit of stress-relief:


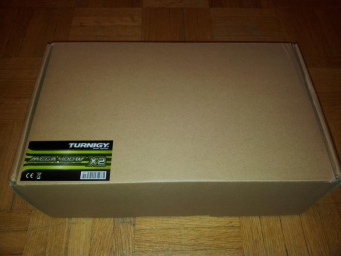
The new supply worked perfectly with my old chargers: with a quiet fan it was only warm to the touch. My only wish was that it had an on/off switch, but unplugging it is no great hardship. Thanks Robert! But now to use that extra power: to HobbyKing I went! Just over a week later a small box showed up for me at work:


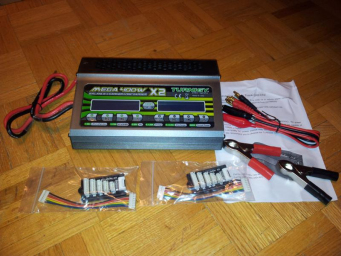
It had thick 10-gauge power leads with standard bullets, 2 sets of charging leads, 2 balance adapter, a set of large alligator clips, and a set of alligator-to-4mm leads. There was no manual beyond a piece of paper to say to go online and download it. The charger was heavier than both my others combined with fans on each end and a large heatsink running the entire width.


One of the first thing I tried was the discharge/storage cycles. It claimed 5a/50w discharge, divided into 2 x 25w (essentially how much power it could dissipate as heat). That 5a drain is what you get with a 1s lipo: for 2s it let me dial in 3a, and for 4s it was closer to 1.5. Still it was much higher than my old chargers. Why does anyone care how fast a charger can discharge a battery? Because lipo batteries have the longest life when they’re stored at just over half charge (standard discharged voltage is 3.2v, charged is 4.2v, and storage charge is around 3.8/3.85v). So if you don’t use all your batteries after going out to play (came home early, got bored, broke something) you need to discharge them before you’re “done” for the day. The faster a charger can bring a battery back to 3.8/3.85v (either charging or discharging) the sooner you’re done.


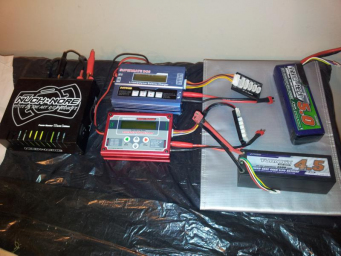
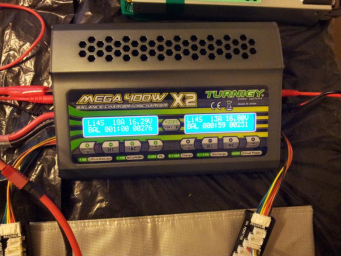
Next I tried higher power charging my 4s lipos. My previous chargers could do (6a+5a=) 11a at 16.8v. Here I had already finished my cycles before thinking of taking a picture, but it shows 18a+13a= 31a at 16.8v (I had been charging at 18a+20a). No problems! Charger stayed cool and the power supply only got warm


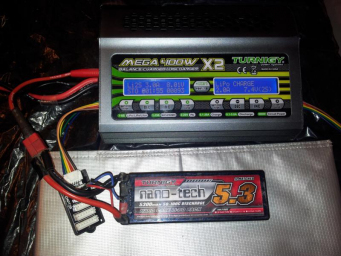
Here’s the new setup. I’ll still charge at 1C when I have time, but it will be nice to at least be able to do two 4s 5000mah lipos at 2s or 3s each.


Now my thoughts on the “Turnigy MEGA 400Wx2” charger so far:

Pros

  • Sturdy construction with a solid metal case
  • Easy to use – standard charge/fast-charge/balance/storage/discharge options (and multi-chemistry)
  • Value – One of the best-bang-for-your-buck chargers rated by power/$$$
  • Came with the core accessories I needed (some multi-pack chargers don’t give you extra leads and balance adapters)
  • Fast! I charged a 4500mah 4s lipo at 4C (18a) and was surprised how fast it beeped to say it was done (and I could have done 2 at once!). I think I’ll like the fast-storage-charge mode even more considering how often I break parts and come home with full batteries 🙂

Cons

  • Loud! – The fans are “smart” about when they turn on, but when they’re on they don’t seem to be variable based on temperature. My old setup was silent except for a soft whirr from the old supply. The new supply is almost inaudible, but with both fans going on the Turnigy charger it sounds like something a notch down from “low” on a hair drier. But it was only ever blowing ambient air: I think it would work fine with slower fans
  • You can only see cell/pack voltages when it’s running a charge/discharge program. I liked how my TP-610c had a menu option to just see the balance adapter numbers without “starting” something. Not a major con, just different
  • Charging leads were 4mm-bullets-to-bare-wire. I had to solder on my own Deans connectors. No big deal, but Deans-out-of-the-box would have been better
  • Price – It’s an excellent value if you’re charging high-capacity 4s batteries or larger, but considering it will cost you about $150 all-in shipped in North America… if you’re only charging 2s lipos at 2C you can save money and get a 100Wx2 model. Probably overkill as a “first charger”

Goes around, comes around…

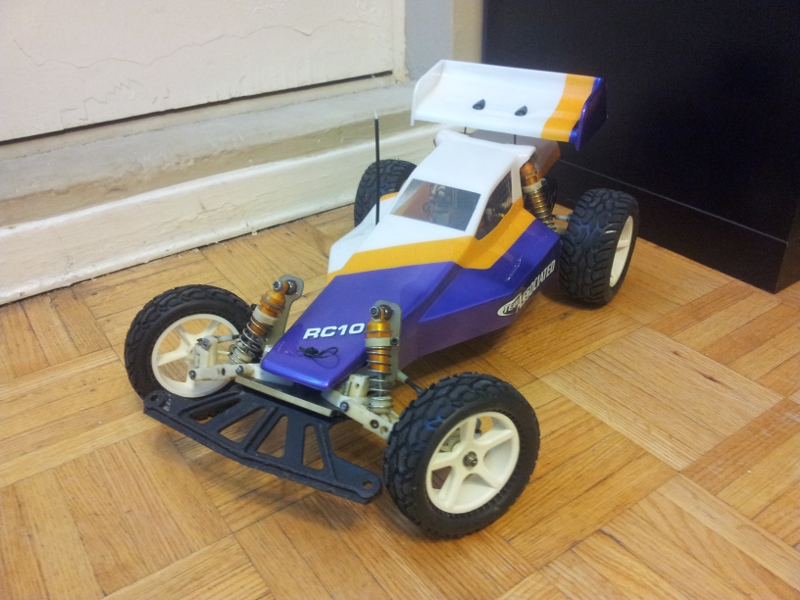
When I got back into RC I rescued a RC10 Graphite and ended up painting it with a simple pattern that I thought turned out well:

RC10 Graphite

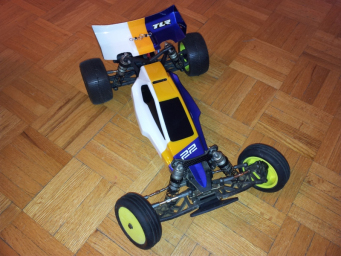
When I realized my 22 needed a different body to run rear-motor instead of the white one I had for mid-motor… I decided to try for the same thing. The chassis was a lot narrower so I couldn’t offset the white-and-purple the same way, but you get the idea:


This car is always going to be running white or yellow rims (or mixed) so it should work fine. I only needed to buy more yellow paint: my last job used it all up 🙂

Sids Raceway – May 5th 2013

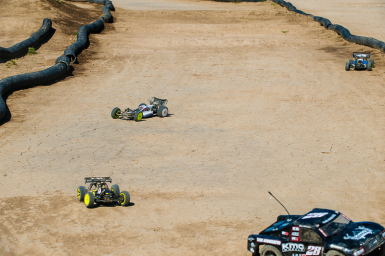
On Saturday I decided to try Sids Raceway (an outdoor track) instead of the carpet I had been running on all winter. Several changes were needed to my Losi 22 to run outside so I didn’t make it until Sunday, and even then I didn’t have time to convert from mid-motor to rear-motor.


There weren’t very many other people there: I never saw more than 5 cars on the track at once, but that did mean there was still room for me under the drivers stand, so I had a place to set up. If you bring an extension cord they had power, a couple of extra tables and chairs, washrooms in the garden center next door, and a convenience store just down the road. I was a nice place to spend a sunny summer afternoon.


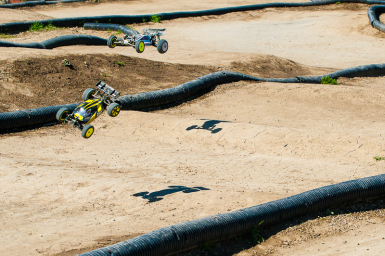
Compared to carpet, driving on the dirt felt like ice, but I wasn’t running with the recommended motor placement or tires so I may be more successful next time. My lap times were all over the place with the jumps being manageable with some practice but my cornering speeds were low and I often spun out.


Sids was fun, and I hope I get to visit many more times this summer! Special thanks to Samer Rizk for taking these great photos and telling me when he put them online here – go see the rest of them!

[Edit: Here’s a short video clip from my smartphone – sorry I don’t know how to edit out wind noise]