AmazingRCStore – April 28th Race!

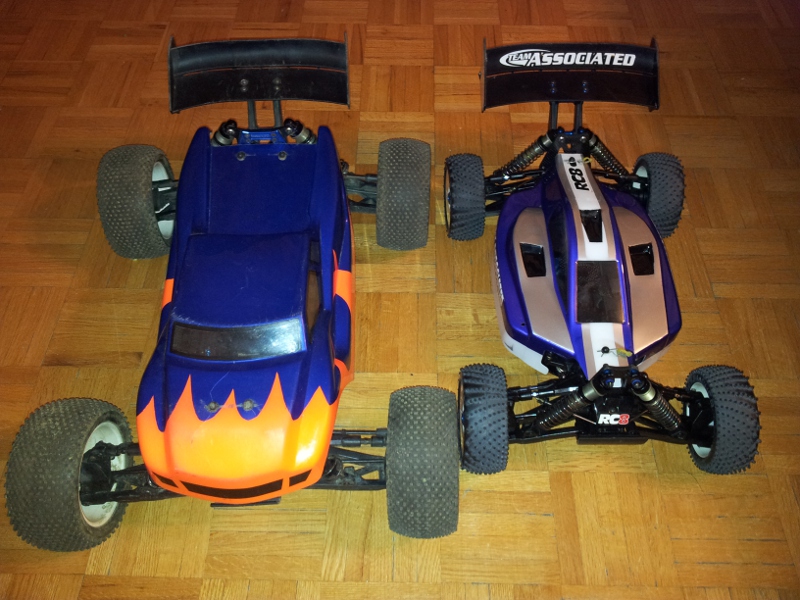
My favorite RC store is at it again: today they had their first race of 2013! I had a lot of fun last year, so I charged up my batteries and got my toys ready to pack in the car:


By the time I rolled in around 3:45 there were already lots of people there. The DJ was playing music and the registration table was signing people up and giving away drinks:


It was the hottest day so far this year and everyone was either sprawled out on the grass hill along the track, or milling about the starting line. Behind the hill was a large lot with plenty of parking where people were tuning their cars and driving for fun. ARCS had received permission to block off a road in Brampton which worked out perfectly: a straight bit of pavement for the racing and lots of room for spectators.


One of the sponsors was the Southern Ontario RC Crawlers. They had a small crawler layout by the sign-in area to show off what they can do. They’re also hosting the new ARCS forum: thanks guys!


RC cars were everywhere: from 1/10th electrics to 1/5th gas-powered. By far 1/10th nitro and electric were the most popular, with a handful of 1/8th’s, and only three 1/6th electrics and three more 1/5th gas RCs.


There were lots of pairs of people to call up for racing, but David and Pamela from ARCs did a great job of keeping everything moving. The main races were interspersed with second-chance rounds for the popular classes, and there were many Free-for-All rounds that anyone could participate in, even people that didn’t have Redcats! There were a dozen RCs racing down the track for the FFA rounds – many people walked away with free T-shirts by winning a FFA (including me!).


Start your engines:


Ready, set, go!


My Shredder did well, winning against 2 others in my class. But I clipped another car and DNF’d the final round – I hope someone got video to see where I went wrong 🙂 . That still got me a consolation prize, and I’ll be back next time! I think I have the speed… just have to keep it straight. Many thanks to the team at ARCS and their sponsors. I wish more RC hobby stores would run events like this!

[Edit April 29th]

There is video! My crash is at about 1:38:

Don’t Steer Me Wrong…

Last November my largest toy had an altercation with a cement post: leaving the front wheels pointed in noticeably different directions. There was also some “minor” body damage:


The front steering crossbar also finally snapped off. It kept bending, and I kept bending it back, you can only do that so many times:


The upgraded bar was pricey for what you got, but I was hoping it would never bend or break again. Here’s the new thicker machined bar on top (with bearings), vs. the thinner stamped (broken) bar on the bottom with the bushings:


Here’s a better comparison picture. Hopefully the extra material (and the fact it wasn’t intentionally bent during construction) will make it tougher:


All mounted up!


Finally it can be driven in a straight line again. I also repaired the bodywork with shoe-goo and drywall tape, and have sprayed the mesh with black paint since this picture was taken. Now 10% less ghetto!


Perfect timing, as the ARCS drag racing season is starting back up again!

Harlem Shakey Cam

I haven’t recorded RC video in a long time. But yesterday when I went to Universal Raceway their offroad timing system was broken (new construction)… so I decided have some fun and get new footage:

There wasn’t as much vibration as last time, but I still let YouTube try to stabilize it. Thanks to everyone who let me be a bit annoying and follow them 🙂 (especially Rommel and his green 22T truck)

Skin deep…

Last fall I bought a new clear Lexan body for my Shredder from ARCS, but it was already getting cool outside so I didn’t paint it right away – figuring it could wait until spring.

Well, spring is here! After deciding on a simple paint scheme and ordering the paint I had to scrub the body well on the inside so the tape would stick properly (to mask off the panel colours)


You use masking tape to hide the sections where you’ll spray the lightest colours first, then mask off the darker and darker panels (and in the end you’re usually left with only the parts you want black exposed). Here I’m masking off the rear top panel which will be silver:


Next I hide the front of the body which will end up yellow:


Finally I mask off the rear panels that will be red… leaving me with an exposed triangle on each side (which I have already sprayed black):


The I pull off the rear mask and paint the red:


Exposing the front…


…to paint it yellow. Now only the first top panel is covered with tape.


Finally paint the silver section, which was the first part I masked:


Next I pulled off the overspray film, took a first-pass at trimming the wheel wells, and punched the body-mount holes. Then I applied the Redcat decals that came with the body and mounted it on the Shredder with my extra Losi tires:


Here’s the back: thank you Amazing RC Store!


Finally I put my 2wd buggy in the picture for scale: the Shredder is huge compared to my other cars!


I’ll have to trim the body a bit more before I can drive it with those tires, but that’s a task for another day.

Wall to wall carpet…

I’ve been trying to go to Universal Raceway on the weekends: this is what indoor offroad carpet racing looks like (or at least the practice sessions: real races show good driving 🙂 )

That’s timed practice: split into 1/8th-scale buggies, 1/10 buggies, short-course and assorted,…. and finally 15-minute free-for-all sessions. If you watch the back wall as the cars go over the long set of triple jumps you’ll see where a projector shows a pie-chart flashing who should currently be on the track (look around 1:25-1:27 in the video). During races that projector runs the lap timing system.

I broke about $30 in parts there last weekend. Go too fast around a 90-degre corner? Hit a concrete wall. Land wrong from a jump? Slam in to a concrete floor. The cars are durable… but still… little plastic pieces can only take so much.

Resistance is futile… (but can be measured)

I’ve been playing with toy cars long enough to have collected quite a pile of LiPo batteries, even though I’ve done my best to sell some off when I Ebay’d old RC’s I didn’t want any more. Some of the batteries are new, some came used as part of a larger sale, but most of them worked fine. Still, they do degrade over time, and a couple were noticeably down on usable runtime.

I spent some time on Google trying to figure out if there was a way to measure when LiPos go bad: or at least a way to track their deterioration. It turns out the heli/plane RC hobbiests had started to measure their batteries to determine their “Internal Resistance” (IR) or “Effective Series Resistance” (ESR) – packs/cells with higher resistance were less able to sustain voltage under load, and turned more of the current flowing through them into heat. Long story short: low resistance = good, high resistance = bad. I wanted to start recording which brands of batteries were degrading the quickest, so I bought an ESR Meter. Here it is with my 4 4S packs: two Zippys, and two Turnigys:


I had bought the two Zippy’s new, but after 2 summers of running they would constantly bounce off the LVC (low voltage cutoff) if I ran them fast… but would work fine if I drove slow: there was something wrong with them, but I wanted proof. Testing packs was simple: with just the main battery leads hooked up you were measuring the total pack resistance (including wires and Deans connector) under a brief 16a load. Here my used Turnigy nano-tech 5000mah 4S pack was measuring 19.8 mOhms:


With the balance tap plugged into one cell through the battery balance port it would measure the resistance of just that single cell. In this case 3.28 mOhms. This Turnigy battery came used as part of a combo with an RC car, so I don’t know how many times it has been charged, but it has served me well in my RC8Be and RC8Te.


The Zippy batteries showed me the numbers I expected: about 50% higher total resistance of the previous Turnigy (34.2 mOhms):


…and about the same difference in per-cell resistance as well (here 6.92, but as high as 7.36):


When I ran those Zippy packs in my RC8Te they would come off very warm: I knew it was time to retire them but now I have some numbers to back up my decision. Next I fed my other older batteries to the meter: it pointed out one 2S pack with much higher connector resistance (likely a bad solder job, doh!) as well as two packs that seemed OK in a car but the that the meter said were on their way downhill. I’m going to start to record how many charges go through them and measure them again after 10 more cycles.


Finally, the numbers I really wanted to get: resistance from 4 new packs I had just bought from HobbyKing: all Turnigy nano-tech: two 2S saddles for my Losi 22, and two 3S sticks for my Caldera.


The numbers were… in line with what I had read about, but not as low as I had hoped. Average cell resistances were 4.84 and 5.1 mOhms for the saddle packs, and 4.05 and 4.47 mOhms for the stick. Not bad, but not a good as some of my used batteries. The sticks had one charge through them, and the saddles had two: and I had read two things:

  • I should charge them at 1C for the first 5-6 cycles or so
  • Cell resistance often drops after the first few charges

So, I’m going to wait until I’ve run each pack 5-6 times then start charging at 2C, then measure them again after they’ve reached 10-12 cycles. I’m hoping I see their resistances dip (under 4 would be nice)… then slowly climb with age. Based on the Zippy results, once they get around 6 or higher they’ve reached the end of their usable life (at least with the current draw of an 1/8th-scale brushless setup: 1/10th buggy use may be fine?)

Summary numbers:
(all mOhms)
Average for all my new Turnigy cells with 1-2 charges through them: 4.62
Average for my almost-dead cells: 7.13
Average for all my used cells that seem OK when driving: 3.99
Lowest resistance cell: 3.28 in a Turnigy nano-tech 4S 5000mah “40-90C”
Highest resistance cell: 7.36 in a bad Zippy 4S 40C
Average connector/wire resistance (pack resistance, minus per-cell resistances): 6.39

Update: April 2nd 2013

I now have 15 cycles through one of my Turnigy 65-130c 2s 5100 saddle packs, and 17 cycles through the other. One pack dropped average cell ESR from 4.84 to 4.78, and the other increased from 5.12 to 5.34 – so effectively the “actual C” rating of the packs didn’t change. I measured at the same temperature, and after full balance charging. I’ll try to measure them again around 30 cycles.

Spring in your step…

…or in your toys 🙂

Soon after buying my Caldera SC 10E I swapped out the stock shocks with a set of Traxxas Ultra XXL’s… since I didn’t have extra springs for the stock Redcat shocks (and they seemed to stick a bit)… and because I had the Ultras on the shelf with lots of springs left over from running my Stampede.


The Ultras XXL’s are a bit longer but fit fine: the extra length just gaves you some extra droop – swapping in XL shafts probably would have made them the same length as stock. (Note: If you put Traxxas Ultras on your Caldera, buy an Integy MSR9 spring set as a cheap way to get a good initial collection of springs – I ended up using a pair of the front springs: blue/4.7’s and red/5.8’s. Or buy Traxxas or Losi springs)

I wanted to recycle the Traxxas shocks on another project, so I started to read more about the stock Redcat’s. Someone on a forum said they were similar to Traxxas E-Revo/Jato “GTR” shocks, and the overall size of the springs seemed close enough, so I ordered some GTR springs. I had also smashed a stock lower spring retainer… and the only Redcat option seemed to be to buy a new set of shocks, so I ordered some GTR retainers as well. Part #TRA5465: I only needed the bottom pieces but I was hoping the ride-height ring or shock cap may fit as well:


The GTR springs fit perfectly on the stock Caldera shocks, and the bottom retainer does as well (but the ride-height ring had a finer thread and didn’t fit, and I didn’t try the shock caps). On the left is the stock shock w/retainer and the stock white spring, and on the right is a Traxxas GTR spring and GTR bottom retainer on the Redcat shock body. GTR springs are a few mm shorter than stock Redcat, but that difference is easily accounted for by twisting the ride height ring a bit further down.


The retainers are effectively identical: it was hard to get a good picture but the Caldera is on the left and the Traxxas is on the right. They use the same cut-out design and the only way I could tell them apart was that the Traxxas one had much sharper and distinct molding (more defined corners) while the Redcat corners were more rounded.


So what does this mean? Traxxas GTR aluminum shocks are almost certainly a drop-in replacement for the Caldera shocks (though I haven’t tested this: the springs are a tiny bit shorter). At a minimum GTR springs can be used and are very easy to find, since every hobby shop stocks Traxxas. And GTR lower spring retainers can be used instead of buying all new shocks if you smash your Redcat ones!


Traxxas GTR springs are sold with a totally different number rating than you may expect, at least compared to Integy ratings if you had Ultra shocks. Since I was using 4.7/5.8 springs on the Ultras I bought similar ratings for the GTR springs… but they were way way too stiff! I ended up using 1.8-front and 1.6 rear… and those are still slightly firmer than the stock springs. Here’s some GTR Traxxas part numbers I dug up: ((w) is a white spring, (r) is a red spring):

TRA5427 0.7 Yellow (w)
TRA5428 0.9 Orange (w)
TRA5429 1.0 Tan (w)
TRA5430 1.1 Green (w)
TRA5431 1.2 Silver (w)
TRA5432 1.3 Gold (w)
TRA5433 1.4 Pink (w)
TRA5434 1.6 Blue (w)
TRA5434a 1.6 Double Blue (r)
TRA5940 1.8 Double Green (r)
TRA5941 2.0 Double Black (r)
TRA5942 2.3 Double Purple (r)
TRA5435 2.6 Yellow (r)
TRA5436 2.9 White (r)
TRA5437 3.2 Orange (r)
TRA5438 3.5 Green (r)
TRA5439 3.8 Gold (r)
TRA5440 4.1 Tan (r)
TRA5441 4.4 Black (r)
TRA5442 4.9 Silver (r)
TRA5443 5.4 Pink (r)
TRA5444 5.9 Blue (r)
TRA5445 6.4 Purple (r)

Final Note: A small bit of maintenance on your stock shocks can make them significantly less sticky. With mine, even with the oil drained and the springs off, I found the shafts had a lot of stiction making the shafts hard to slide in and out. The problem was two-fold: first the bottom outside oring cap was screwed on much too tight (all the way down) which was squashing the orings and making them bind to the shock shaft much too tightly: unscrewing that cap by about 1mm immediately made the piston movement much easier, and the shocks still didn’t leak. Second: the two orings had been squashed in there so hard the outside one was running completely dry – a little bit of AE or Losi shock lube (I used this) coating the orings before I put them back in made the shocks even smoother. Still not as nice as Traxxas/Losi/AE shocks with TiNi shafts, but much better than out-of-the-box!

Winter is here, sort of…

Normally winter starts when we get our first doesn’t-melt-the-next-day snowfall, but living in Toronto I’ve had to make exceptions. This year I’m counting winter as starting today, when I first moved my summer hobby indoors.


I made my first trip back to Universal Raceways with a new-to-me Team Losi 22 2wd buggy, bought from a really friendly guy I met on LondonRC.

This isn’t my video, but it does show how I should be driving, eventually:

Today if I made it one lap without flipping the car over I patted myself on the back. Baby steps.

Daisy, Daisy, give me your answer do…

My computer has lost its mind: at least the one running my website 🙁

While on vacation I started to receive email from my VPS provider: saying that some of their systems were compromised and that many customers were being reverted to their plain-vanilla virtual machines, or restored from backups. I was one of the people who got everything wiped, and had to fall back on my own backups.

No big deal, right?

I had automated backups configured for this website and my Minecraft Server…. however they weren’t working properly, and in the case of the Minecraft backups I had gotten lazy:

  • The website database backups automatically get sent to me by email (they’re small), but that feature was part of a plugin that got disabled during a WordPress upgrade back in March 2012 – and I didn’t notice
  • Because I had lots of disk space on my server, and because Minecraft backups are large: I had been keeping a rotating collection of backups… but on the server. That was protecting me from doing something stupid (i.e. failed Minecraft update).. but wasn’t protecting me from a complete server meltdown
  • Long story short: except for a few exceptions I had to roll everything back to how it was in March, then cobble back together any blog updates from then until now. We lost about 6 months of Minecraft updates: lots of world changes we’ll have to redo, and blog updates (if any) between Dec 2011 and March 2012 are gone too. I just spent 4 hours stitching things back together, and this is as good as it’s going to get.

    Current task: make sure everything “in the Cloud” gets copied to my home PC every day 🙂

    MegaE XB10 – More Mega…

    [Recovered: Original post date Sept 16th 2012]

    My Himoto buggy has been running fine, but hot: the 4600kv Castle motor I had in it was faster than stock… but I’ve read that even the slower stock motor ran hot: and there’s not much room to gear down. Solution: buy a cheap slower motor, in this case a Tacon 3660 3500kv.

    Here it is compared to the previous motor: new Tacon on top (light green) and old Castle on the bottom (dark green). The Tacon is about 1cm longer:


    It just clears the ESC… the motor wires on Tacons aren’t that flexible, so I let them ride over the ESC fan and bent the ESC wires to meet the motor wires instead:


    Here it is after the first test run:


    Because I wanted better performance in the grass I had also ordered a set of 2.2″ ST tires: at $20 for a pack of 4 I couldn’t say no. During the test runs the motor and ESC were on the upper range of acceptable temperatures with the body off… but still too hot with the body on. The buggy body fits tight… so I’ll drill some holes in my old basher body first to see if I can bring the temps down. If that doesn’t work I may turn it all the way into a Stadium Truck so the motor can hang out in the breeze.